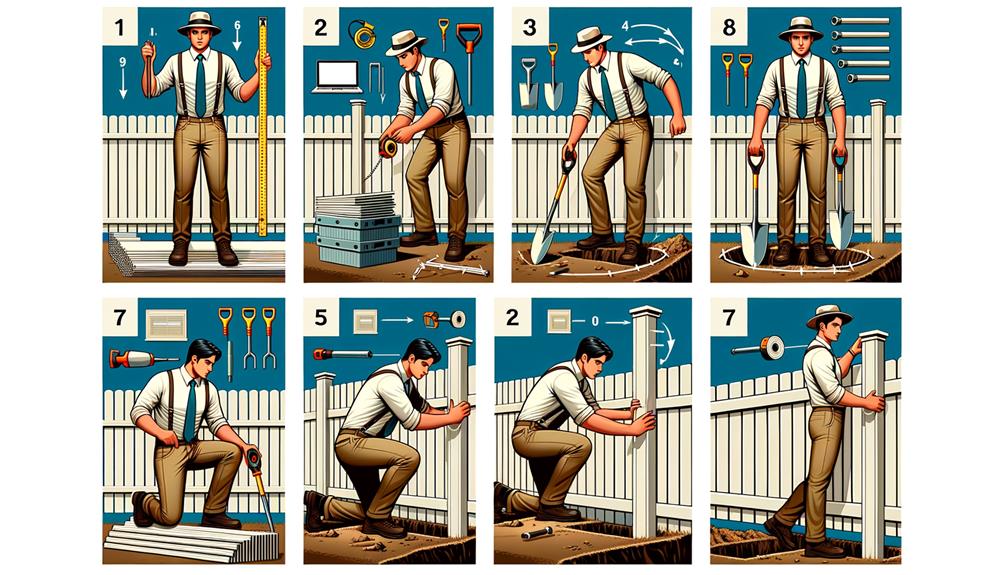
Putting up a vinyl fence may seem like a daunting task, but fear not, for it is not as complicated as it may appear. By following a few simple steps, you'll have a sturdy and visually appealing fence that will make your neighbors green with envy. So, grab your tools and roll up your sleeves because it's time to transform your outdoor space into a sanctuary of privacy and style.
Determine the Fence Layout
To determine the layout of your vinyl fence, start by measuring the perimeter of your property. Accurate measurements are crucial to ensure that your fence fits properly and is aesthetically pleasing. Here are some measuring techniques you can use to get precise measurements.
First, gather your tools. You'll need a measuring tape, pencil, and paper to record your measurements. Begin by identifying the boundaries of your property. Walk along the edges, taking note of any obstacles such as trees, bushes, or uneven terrain that may affect the placement of your fence.
Next, measure the length of each side of your property. Start at one corner and stretch the measuring tape taut along the boundary line. Record the measurement in feet and inches. Repeat this process for each side, ensuring that you measure from the same starting point for consistency.
Once you have measured all sides, add up the lengths to determine the total perimeter. This will help you estimate the amount of vinyl fencing material you'll need to purchase.
Choosing the right fence style is also an important consideration when determining your layout. Vinyl fences come in various styles, such as privacy, picket, or ornamental. Consider factors such as the purpose of the fence, your desired level of privacy, and the overall aesthetic of your property.
Gather the Necessary Tools and Materials
Before you can begin installing your vinyl fence, make sure you have gathered all the necessary tools and materials. Having everything you need at hand will help streamline the installation process and ensure a successful outcome. Here is a list of the essential tools and materials you will need:
- Tools:
- Level: This will help ensure that your fence is straight and properly aligned.
- Post hole digger: You will need this tool to dig the holes for the fence posts.
- Tape measure: Accurate measurements are crucial for a well-installed fence.
- Screwdriver or drill: Depending on the type of fasteners you choose, you will need a screwdriver or drill to secure the fence panels.
- Saw: You may need a saw to trim the fence panels to the correct size.
- Materials:
- Vinyl fence panels: There are various types of vinyl fence options available, including privacy, picket, and ranch style. Consider the overall aesthetic and purpose of your fence before selecting the appropriate panels.
- Fence posts: These provide the structural support for your vinyl fence. They can be made of wood, metal, or vinyl.
- Fasteners: Choose between screws, brackets, or clips to secure the fence panels to the posts.
- Concrete mix: This is essential for setting the fence posts securely in the ground.
- Gravel: Placing gravel in the bottom of each post hole will aid in drainage and stability.
When it comes to the pros and cons of using vinyl fencing, there are several points to consider. On the positive side, vinyl fences are highly durable, low maintenance, and resistant to rot, rust, and insect damage. They also come in a variety of styles and colors, allowing you to find the perfect match for your aesthetic preferences. However, vinyl fences can be more expensive upfront compared to other fencing options, and extreme temperature changes can cause the material to expand or contract, potentially affecting its appearance and structural integrity.
Prepare the Ground and Dig Post Holes
To prepare the ground and dig post holes for your vinyl fence installation, you will need to assess the area and plan out the placement of the fence. Before you start digging, it is crucial to ensure that the ground is properly prepared. Start by removing any rocks, debris, or vegetation from the area where the fence will be installed. This will prevent any obstructions that could hinder the installation process.
Next, mark the locations where the fence posts will be placed. Use a tape measure to ensure that the spacing between the posts is consistent. Typically, vinyl fences have post spacing of around 6 to 8 feet. Once you have marked the positions, it's time to dig the post holes.
Digging the post holes is an essential step in the installation process. The depth and width of the holes will depend on the height and style of your vinyl fence. As a general rule of thumb, the holes should be one-third of the height of the fence. For example, if your fence is 6 feet tall, the holes should be at least 2 feet deep. The width of the holes should be approximately three times the width of the fence post.
You can use a post hole digger or an auger to dig the holes. A post hole digger is a manual tool that allows you to dig holes easily. An auger, on the other hand, is a power tool that makes the digging process faster and more efficient. Whichever tool you choose, make sure to dig the holes straight and evenly spaced.
After digging the holes, inspect them to ensure they are the correct depth and width. If necessary, make any adjustments before proceeding with the installation. With the ground properly prepared and the post holes dug, you are now ready to move on to the next step of installing your vinyl fence.
Install and Secure the Fence Posts
Now it's time to securely install the fence posts for your vinyl fence. This step is crucial for ensuring the stability and longevity of your fence. Here's what you need to do:
- Setting post depth: Start by measuring the depth of your post holes. The general rule of thumb is to dig holes that are one-third the total length of the post. For example, if you have a 6-foot post, the hole should be 2 feet deep. This will provide a solid foundation for your fence.
- Securing post brackets: Once you have the correct depth, it's time to secure the post brackets. These brackets will hold the fence posts in place. Place the brackets in the holes, making sure they are level and aligned properly. Use a level to ensure that the brackets are straight.
- Concrete and gravel: To secure the fence posts, fill the holes with a mixture of concrete and gravel. This will provide additional stability. Start by pouring a few inches of gravel into the hole, then add the concrete mixture on top. Follow the instructions on the concrete package for the correct water-to-mix ratio. Make sure the concrete is properly mixed and fill the hole completely.
Attach and Secure the Vinyl Fence Panels
Once the post brackets are securely in place, you can proceed to attaching and securing the vinyl fence panels. Proper panel alignment is crucial to ensure a straight and seamless appearance. Begin by positioning the first panel against the installed post brackets. Make sure it is level and plumb using a level and measuring tape. Adjust the panel as needed until it is perfectly aligned.
Choosing the right fasteners is essential for the durability and stability of your vinyl fence. Stainless steel or galvanized screws and nails are recommended due to their resistance to rust and corrosion. These fasteners should be long enough to securely attach the panels to the post brackets, but not so long that they puncture the vinyl material.
To attach the panels, start at one end and work your way to the other. Place the fasteners through the pre-drilled holes in the panel and into the post brackets. Be careful not to over-tighten the screws or nails, as this can warp or damage the vinyl. It is best to secure the panels snugly, but not too tightly, to allow for expansion and contraction during temperature changes.
Continue this process for each panel, ensuring proper alignment and secure attachment along the way. If you encounter any obstacles, such as trees or uneven terrain, make the necessary adjustments to maintain a consistent and level appearance. Once all the panels are in place, step back and inspect the fence for any signs of misalignment or loose fasteners. Make any necessary adjustments or tighten any loose screws to ensure a sturdy and visually pleasing vinyl fence.


